Flash 5 - part 2: The User-Interface
Introduction
This article will focus on the many, many panels and windows of Flash. It will describe what each one does and how it should be used. Also it will warn you about the few 'quirks' (ie. bugs) which Macromedia missed.
Again, please use this as reference (if you need to) rather than trying to memorise the entire article ;)
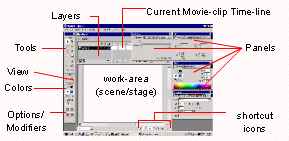
Panel overload
"Hey, what the f*** are all these panels filling my screen?"
Don't worry, its only Macromedia's attempt to scare newbies away from using Flash 5 ;-) You will find yourself opening and closing panels as you work in Flash 5. If you are using Flash 6 (or 'Flash mx' or 'Adobe copyright mx' heheh) then you shouldn't have to worry about this because the panels are all docked along the side of the screen.
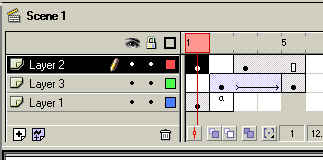
The Layers &emp; Time-line window
This panel controls the current movie-clip (ie. the one you are editing). It defines when items appears (ie, in a KeyFrame), how long they last (ie. the number of Frames) and when it disappears. The layers allow a Z-stack of items to be overlaid during the same frame and also serve to define the Tweens/Morphs animations.
This panel will be more fully described in a later article.
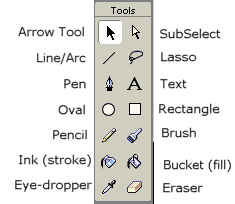
The Tools panel
These are your standard paint-package functions. You'll probably only use the Arrow, Line, Text, Oval, Rectangle and Bucket.
Note: Remember that most of these tools have 'Modifiers' which will appear. One of the most useful (and hidden away) is the Transform Fill modifier. It allows you to position, resize and rotate the gradient fills across a shape.
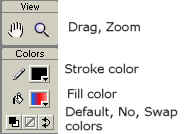
The View and Colors panels
The standard drag and zoom functions.
Colors:
Using these icons will affect ALL the currently selected shapes
on the work-area, so be careful or hit UNDO a lot ;)
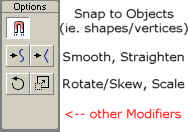
The Options panel
The most useful ones are Rotate/Skew and Scale. These bring up the control handles around a selected item or group of items.
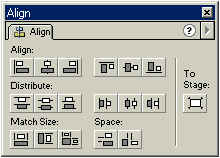
The Align panel
Use this to align single items or groups to either the Stage or to each other. When laying out menus or list of items this is very useful. Just remember to click the 'To Stage' button when trying to center stuff in the work-area.
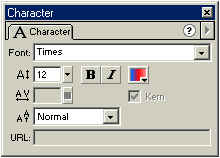
The Character (ie. Text) panel
Along with the Paragraph and Text-Options panels this defines how text appears on the screen. The text color is the same as the Fill color.
You can use the 'Break Apart' option on the Modify menu to convert font characters into editable polygon shapes. This helps to reduce the size of your Flash movie (you don't need to embed the entire font).
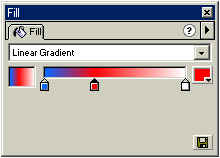
The Fill panel
Use this (sometimes buggy) panel to choose the type of Fill (Solid, Linear, Radial or Bitmap). Using those tiny little slider gadgets you can define the position of the gradient sweeps and numbers of sweeps. To add a sweep simply click under the gradient preview. To delete one, click and drag it off the right of the preview. Click the Color-picker to choose a color. You can also use the Mixer panel to control the Alpha (and Red, Green, Blue) values of each color too.
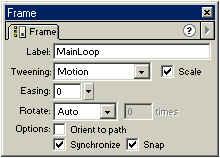
The Frame panel
This controls a frame (or KeyFrame) on the time-line. The Label is used by the action-scripting to go to a particular frame. Tweening is used to morph a shape or tween a position together with Alpha, Scaling and other Recolouring attributes. Easing is used to accelerate or decelerate the tween.
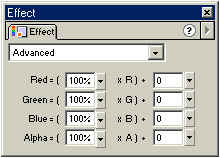
The Effect panel
This controls the 'effect' placed on a Movie-clip (and all of its children movie-clips inside it). Along with Alpha, Brightness and Tint, you have Advanced controls, which allows you to 'recolor' an instance without having to draw it again (saving space).
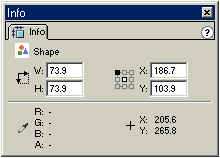
The Info panel
This is your bog, standard pixel perfection placement and resize panel.
Tip: Add a 0.5 to both X and Y co-ordinates to avoid the ugly line smoothing effect.
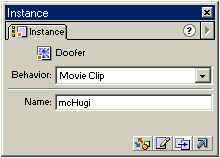
The Instance panel
A Symbol from the library can be forced into a different behavior. For example, a movie-clip can be used as a Button (and so OnMouse events action-scripting can be assigned to it).
THE most important attribute is the Instance Name - without it, your action-scripting won't be able to access &emp; control any movie-clips. Also remember to give each instance a unique name!
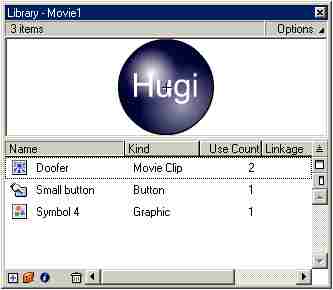
The Library panel
This is perhaps one of the most useful panels. It displays a list of ALL the Symbols (Buttons, Movie-clips, Graphics and Sounds) used in a Movie. You can organise components into folders too, which makes very big projects more managable.
Tip: Leaving the library open and switching to a second Flash Movie allows you to drag and drop components across from a different Movie. (Note: the library window will be dull grey to indicate that it belongs to a different Movie).
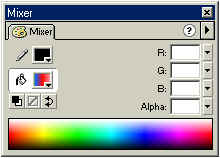
The Mixer panel
Along with the Fill and Stroke panels this allows you to control colors in terms of Alpha. So with a gradient fill you can easily fade one color out to nothing, which is handy for creating some, nice hilite and transparency effects :)
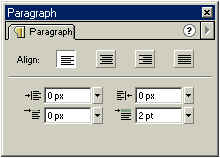
The Paragraph panel
As the name suggests this controls how text paragraphs are formatted. You can also control the margin widths from this panel.
Note: Be careful when bringing up this panel, it usually kills the current paragraph settings on any selected Text :(
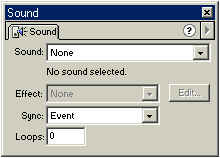
The Sound panel
Use this panel together with the Time-Line to trigger sound-effects. First Import a sound (it will appear in the library), now select a frame on the time-line and choose the sound from this panel.
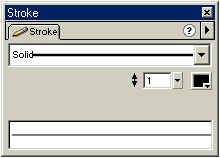
The Stroke panel
Like the Fill panel this determines how shapes on the work-area look. A Stroke is the outside edge region of a polygon. It defines where one shape ends and another begins. Use the Hair-line style when you always want a 1-pixel wide line, otherwise their thickness will depend on the zoom/scale. You can also use the Mixer Panel to control the Alpha of a stroke.
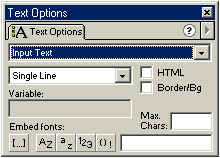
The Text-Options panel
It is easy to confuse this with the Character panel, but this is more important (in terms of action-scripting). Along with Static text there is Dynamic (you can change in real-time) and Input-Text which can be used for creating forms etc.
Note: remember to enter a Variable name otherwise your action-scripting won't be able to change the text.
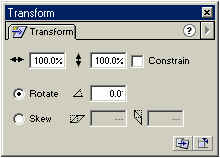
The Transform panel
This works well with the Info panel to control how an Instance on the work-area appears AND can be used to resize, rotate and skew shapes while drawing them.
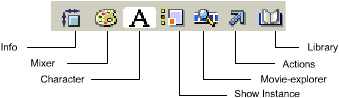
The 'Panels shortcut' bar
This little bar tucked away at the bottom right corner of your screen can help speed up your editing. It allows the most useful panels to be displayed or hidden with a single mouse click.
TIP: Use the Movie-Explorer panel to find a particular symbol, shape, action-script or text quickly, but ALWAYS close it, otherwise your editing will be very, very slow since it constantly updates the entire Movie-Explorer window!
The Menus
For obvious reasons I won't go into detail and describe each option on the main menus, but I will explain the most useful ones later on, as we need to use them. Most of them should be fairly obvious, if not, hit the magic F1 = Help option.
Closing words
Okay, you should have a good understand of the Flash UI and what the
panels are for. If you get lost, then right-click on the item you are editing
and search the Panel options menu for help. You should soon get the hang of
this Flashin'.
The next part will be more fun (I promise) and will look at some basic drawing functions including the unique way Flash deals with touching polygon shapes and lines.
Happy Flashin'